Mel asked me to go along to Godfrey's with her as they had a big sale on and her Dyson had died the week before. They had some cheap suckers there but they all looked a bit average and she would have had to pay about $100, so I talked her out of it, bought a $15 "dustbuster" style thingy for myself (how cheap is that!) and set about repairing her Dyson. When I had a closer look (it wasn't mine) I could see that the power plug had been replaced at some stage and the power cord looked pretty thin so I pulled that apart first but it looked good. You have no idea if it's on or off with the silly yellow switch so I kept clicking that like crazy whilst I wriggled and pulled on everything in sight but it made no noises. I started to pull stuff off it and found that the filters before the motor were pretty dusty, but the filter after the motor (the HEPA one underneath the dust canister) which should have been fairly white was clogged with sooty black stuff with a few little black solid bits lodged in it. That had to mean that the magic smoke had escaped from the motor and bits that were originally a part of the motor were no longer. 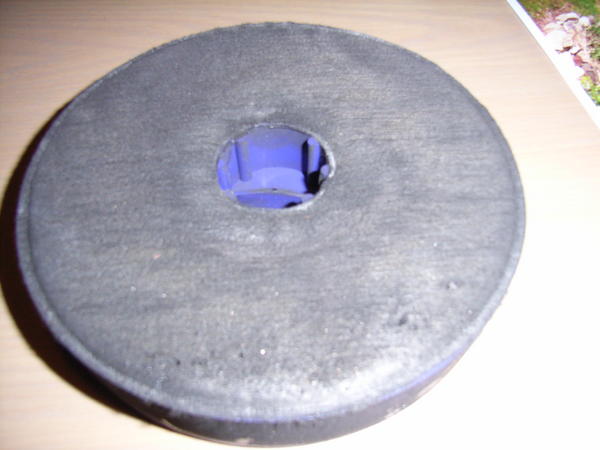 The next problem was how on earth do you pull this thing apart? There are only two screw holes visible. The one on the bottom was too far inside the case as my Torx T15 screwdriver wasn't long enough to reach it. That left the one under the dust canister, but removing that didn't make any difference. I decided to pull more stuff off. 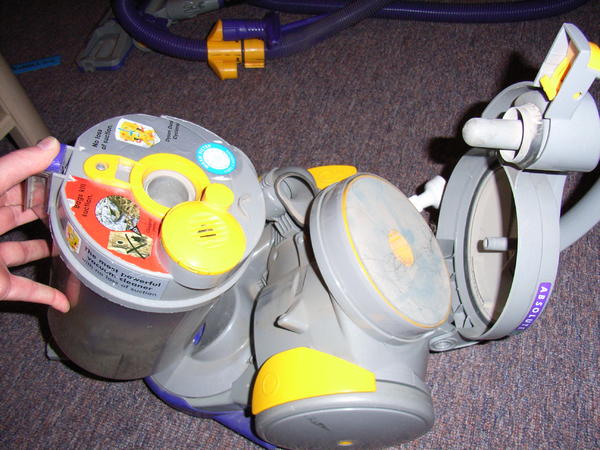 Remove the cover that sits under the dust canister by pressing in the two tabs to reveal the after motor HEPA filter. Notice how this side of that filter is white, but the other side in the picture above is black! 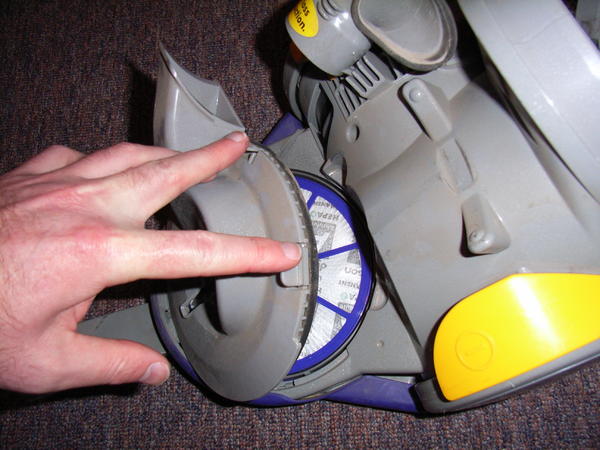 I had used Google to do a bit of research, and the few sites I found that were helpful all said that I had to use a large screwdriver to prise the wheels off either side to reveal another four screws. Well I tried real hard, but those wheels were on there for good. I'm sure that I would have pushed the screwdriver through the plastic if I had pushed any harder! I gave up on that idea when I realised that I could prise the wheels apart from the casing just enough to get my Torx screwdriver in the gap. There are two screws on each side hidden by the wheels. 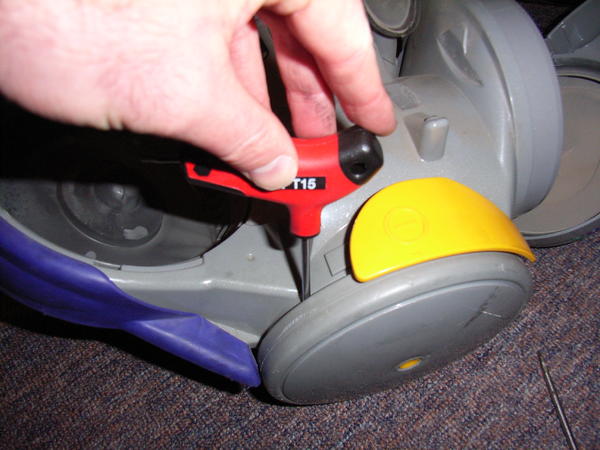 The blue plastic (it's all plastic!) bumper on the front pulls off easily from each end. You can see the remnants of the magic smoke as it wooshed out of the motor here. 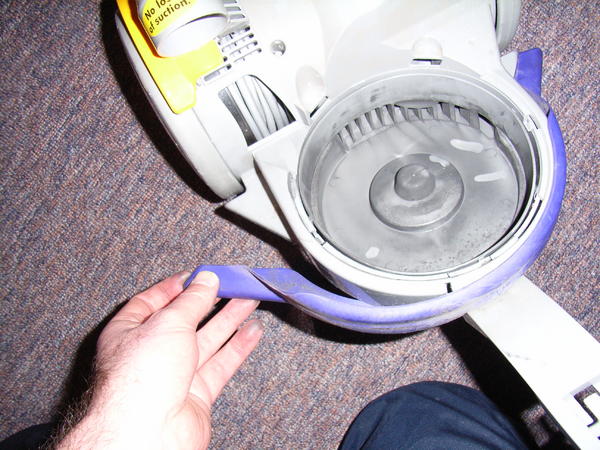 By pulling the wheels apart from the casing the top cover can now be removed. 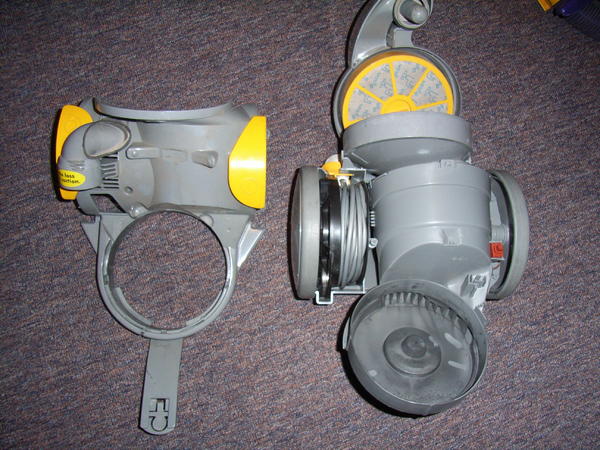 The motor is still encased in plastic, but we are getting closer! The motor casing just lifts straight out and Mr Dyson kindly put connectors on the power wires. 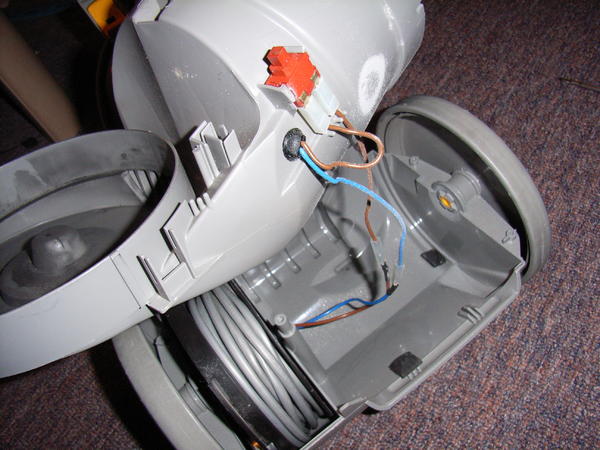 The end of the motor cover pulls off if you prise the plastic clips apart a bit with your fingers. 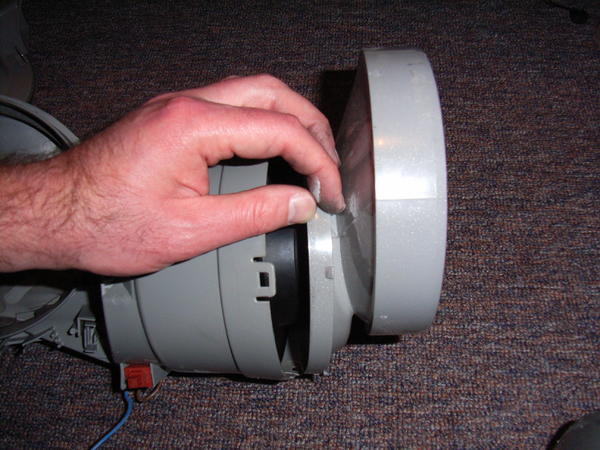 It all pretty much just falls apart now. The big black rubber thing pulls out and the motor literally fell on the floor! Mr Dyson lost the plot a little bit here cause the brown wire connected to the red wire and the blue wire connected to the black wire, but at least his handy little connectors were there. 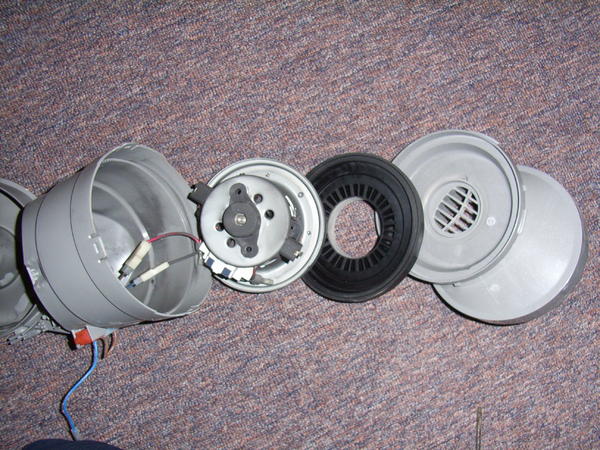 I rang Dyson Australia and they quoted me between $70 and $95 for a replacement motor with only $5 for postage. They wouldn't confirm the price until they had a purchase order. They also told me that the Hobart distributor is B & W Electrical. B & W had one in stock for $85 so I quickly went and grabbed it! Putting it all back together was just the reverse process. I decided it needed a new Hepa filter but B&W had sold the last one that morning. The lovely lady found a slightly used one and gave me that for free!  |